Before we get started, it's important that you have a basic understanding of what the Adobe Illustrator pen tool is and how to use it. If you have never used this tool before, check out this video for an explanation of the basics. The lines that you see coming out of his anchor points when he clicks and drags are called "tangent lines." These tangent lines affect the direction the curve will move.
When using the pen tool it’s important to go slow. If you try to go too fast you’ll end up making mistakes and having to redo things, so take it one point at a time. It’s best to use 4 points to map faces because it's a sufficient number to get an accurate face shape. Using 3 points will only work on small or triangular faces. Using 4 points is most reliable and generally more accurate. Remember, using more points may make the shape more accurate, but it can also make the shape look unnatural and/or lumpy. Additionally, the more points you add, the more points you will have to code, which will make your recreation in Processing more difficult. This is why I would recommend sticking to a max of 4 points: it's enough to create a mostly accurate shape without having so many points that it becomes too unruly in Processing.
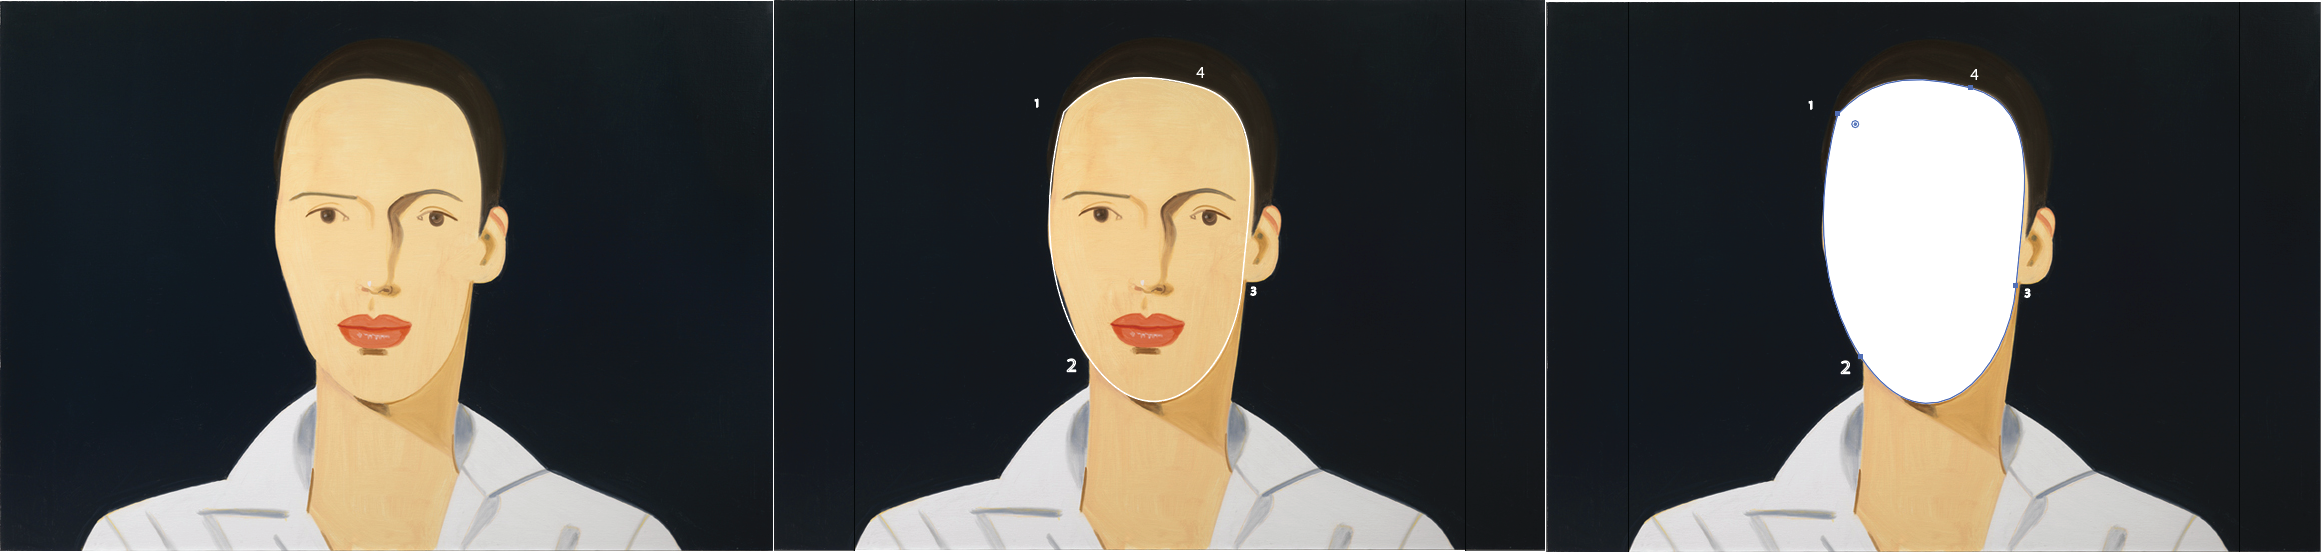
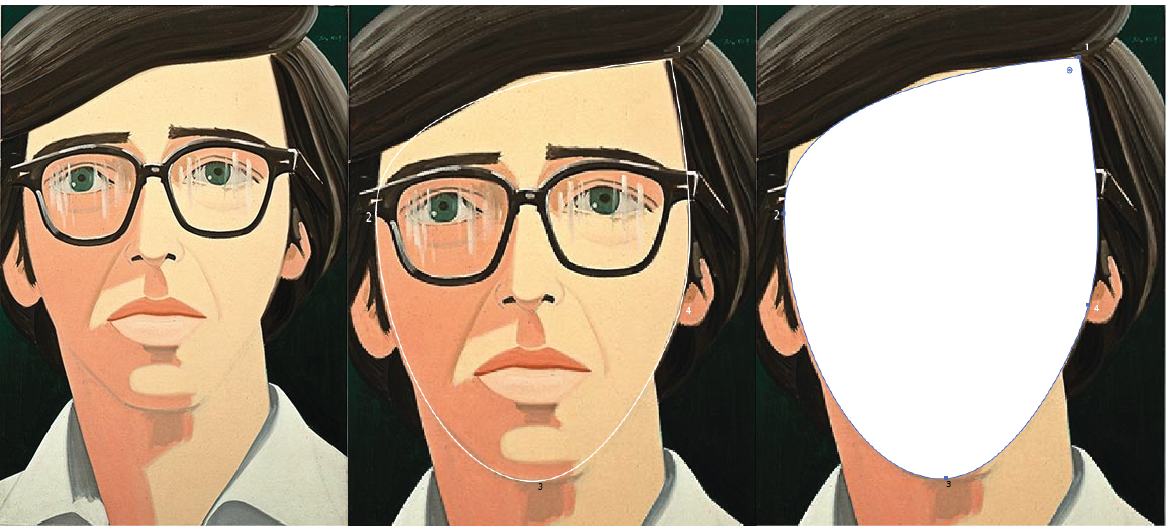

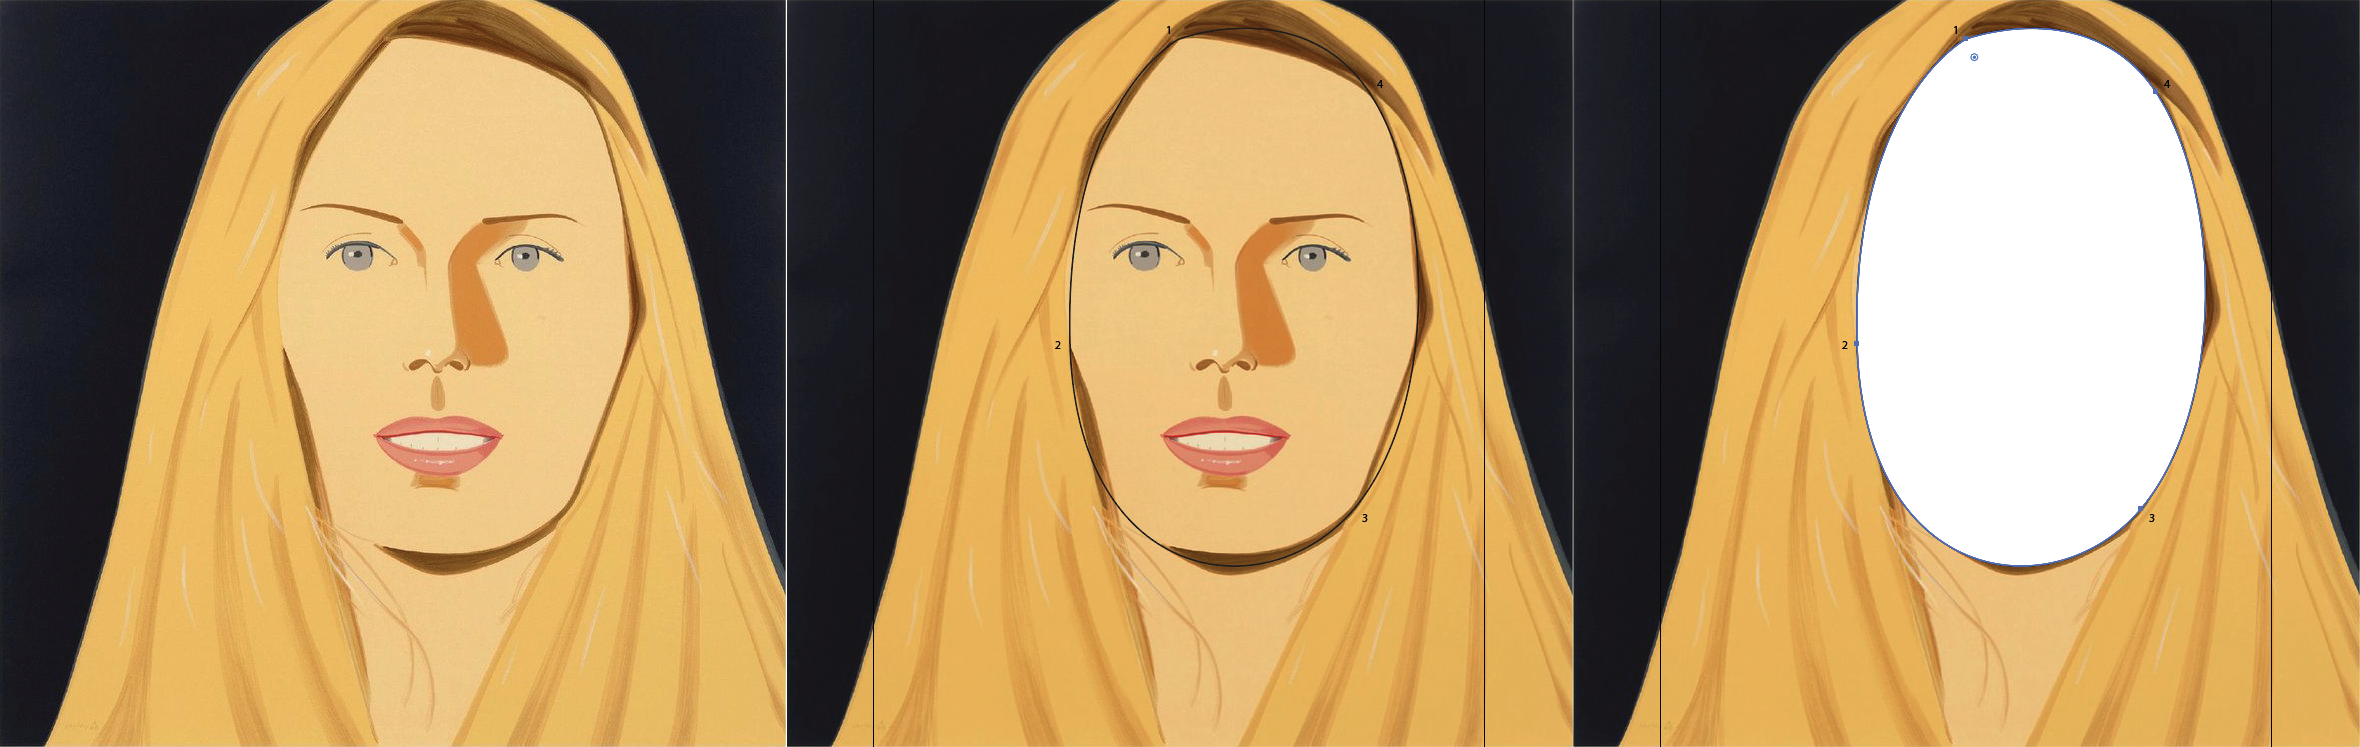
I find that it’s best to make the first point on the hairline at the top of the forehead. When the person’s hairline is round (like with examples 1 and 4) I find it best to start at the highest point on the forehead--near the center of the hairline. However, when the person has a hairline that isn’t round, it’s best to start at a corner of the forehead, typically the corner that is less rounded (as with examples 2 and 3). This is becuase it's more difficult to create a non-rounded corner in the middle of a shape than at the starting point because at the starting point the tangent lines only affect the section of the line on their side of the point. When making this first point, it’s important to just click and not click and drag or else the line coming from this point will not be straight because dragging affects the tangent line at this point.
To make the next point, you can move either clockwise or counterclockwise around the face. In the attempts that I’ve made at this the majority of faces work best when traced counterclockwise. Some can be done well moving clockwise, but I had better results tracing counterclockwise with these. However, this could be because I'm right-handed, so I would recommend trying it both ways to see which works best for you. To select the exact position of this point, it’s best to find the next “corner” of the face. By this, I mean that if you were to draw the face using only 4 straight lines, this point would be where a corner would be. Another way to think of this is to trace the outline of the face with your finger. The corner will be the place that your finger changes direction. Unless the direction change is very dramatic, as with example 3, the third point won’t be exactly at the corner. Choosing where to place the point isn’t an exact science, unfortunately, but it is usually a little farther along the edge of the face than the corner. So, if the corner is counterclockwise from the starting point, the second point you should draw will be a point counterclockwise from the corner. It may take a few tries to get exactly the right point, but that’s okay; take your time to make sure you get the result you want.
When selecting this point, click and drag the mouse to adjust the tangent line, which changes how curved the line is. Try to make the line curved to match the edge of the face. It’s important to keep in mind that the tangent line affects both the line that was already drawn and the next line you’ll draw. The longer the tangent line is, the more it will affect the direction of the next line. Similarly, the more angled the tangent line is, the more it will affect the direction of the next line. It’s difficult to tell exactly how the next line will be affected, so it may take a few times to get the point placement and tangent line drawing working well together. A good thing to note is that the next line drawn will continue to curve in the same direction the last line curves–it will move away from the tangent line. Don’t give up on a point placement just because the tangent line is long or angled, it may help the next line, rather than hurt it. It’s important to try to draw the next point with a tangent line/point combination before giving up on it.
To draw the third point, try to get as far around the face as you can. For some faces, this might only be to the chin, like in example 3, but for others it may be the other ear, like in example 2. How far around the face you go has some to do with the tangent line of the second point because if the line is very curved you may be able to use that to curve the line around the chin without adjusting the tangent line of the third point to much. Once you choose the third point, adjust the tangent line so it best matches the outline of the face.
When choosing the fourth point, find the corner that is the opposite direction from the first point that the second point is. For example, if your second point is the corner counterclockwise from the first point, your four point should be the corner clockwise from the first point. Click and drag to adjust the tangent line as is needed.
Lastly, attach the line to the first point you drew. Be sure to click and drag to make sure the last line lines up with the edge of the face. You may need to redo some or many of these steps to get the outline exactly right, but that’s okay. Take as much time as you need and be patient; you'll be happier with the outcome that way.