This process can be done using both for and while loops, but because the process for both are so similar I will only expressly go over the process using a while loop, but I will include examples of for loops.
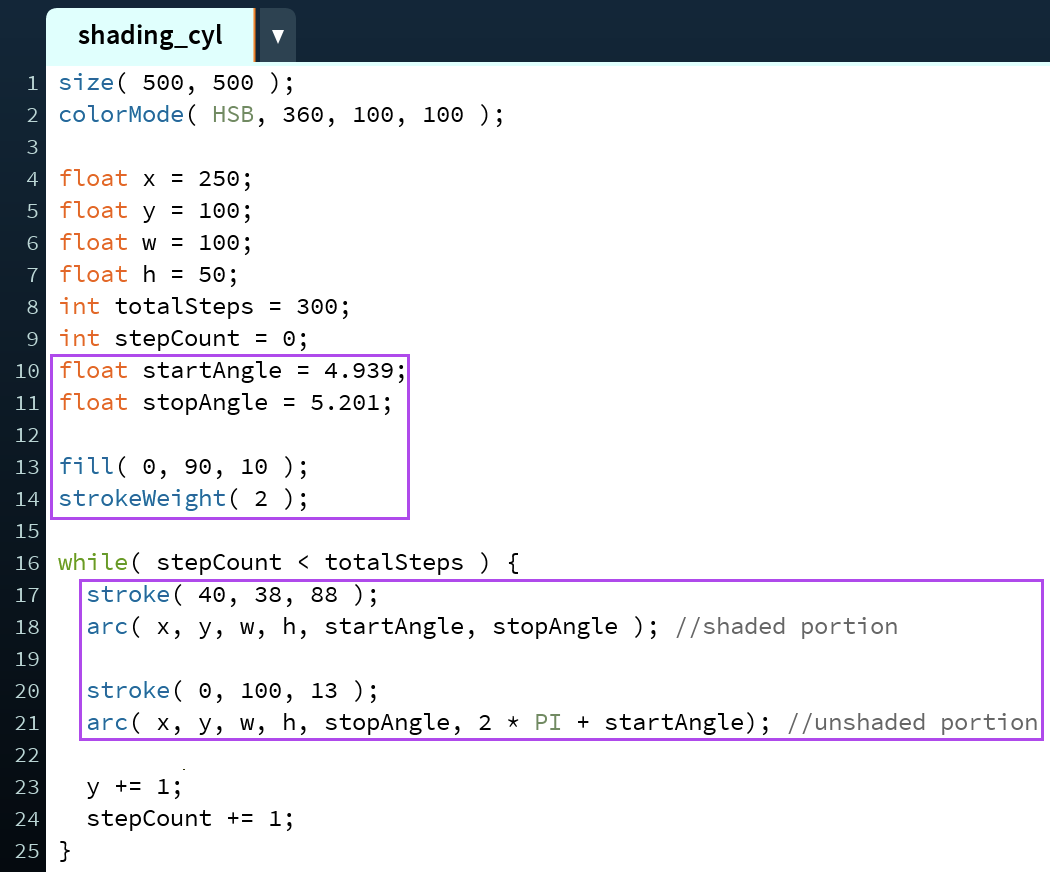
To shade cylinders in perspective, you must first create a cylinder in perspective, meaning that you already have a loop set up for a cylinder. You will also need to know the start and end angles of the shading because you will be creating using arcs. I included these values as the variables startAngle and stopAngle to make the code easier to follow (lines 10 - 11 below). Remember, Processing is set in radians, so these values need to be radian values. You should start with something that looks like this:
Technically, when drawing these shaded cylinder we won't be drawing a stack of ellipses like we did when we drew unshaded cylinders. Instead, we will be generating a stack of arc pairs. Each arc pair will have the same fill color, but the two parts will have different stroke colors.

When these arcs are drawn next to each other, they will look like a whole ellipse, so it will look like we are drawing a cylinder made up of a stack of ellipses when, in fact, it's a stack of arcs.
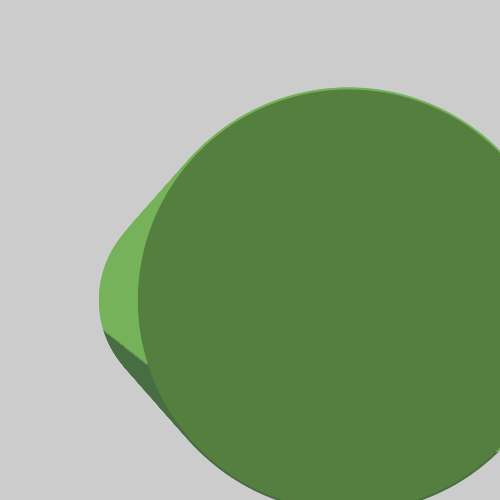
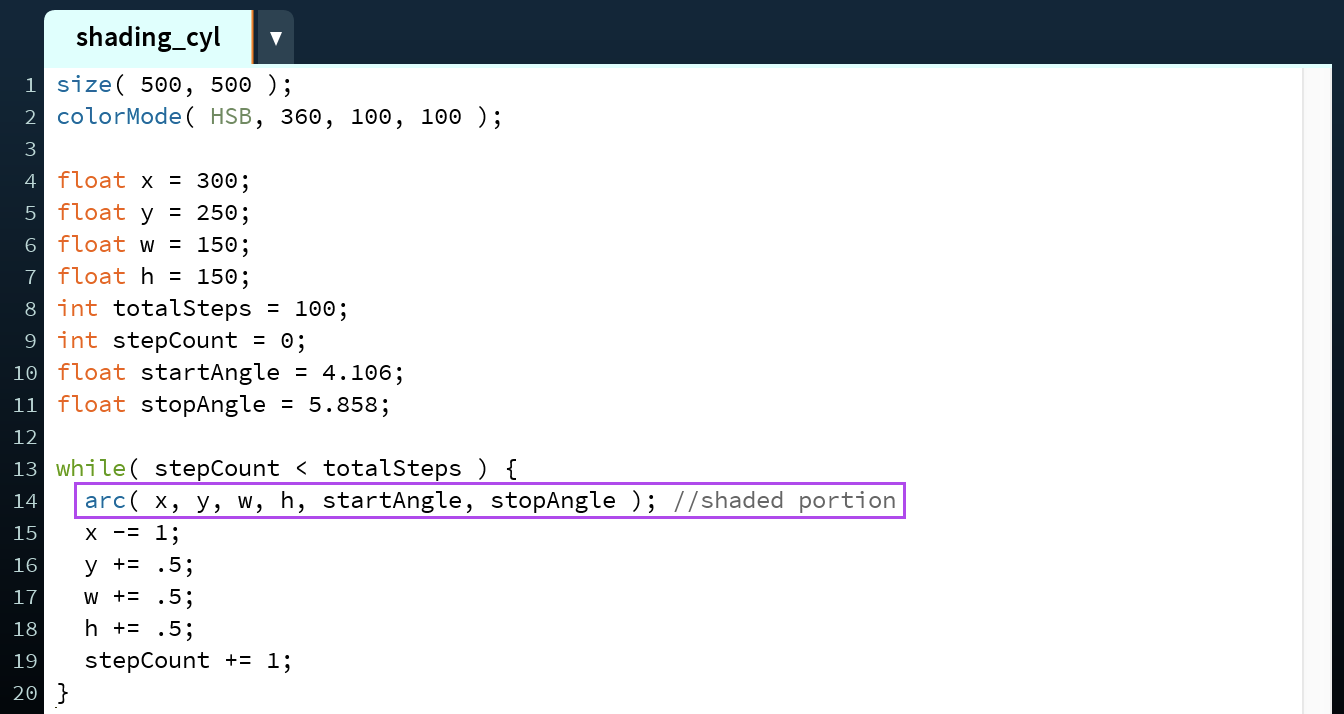
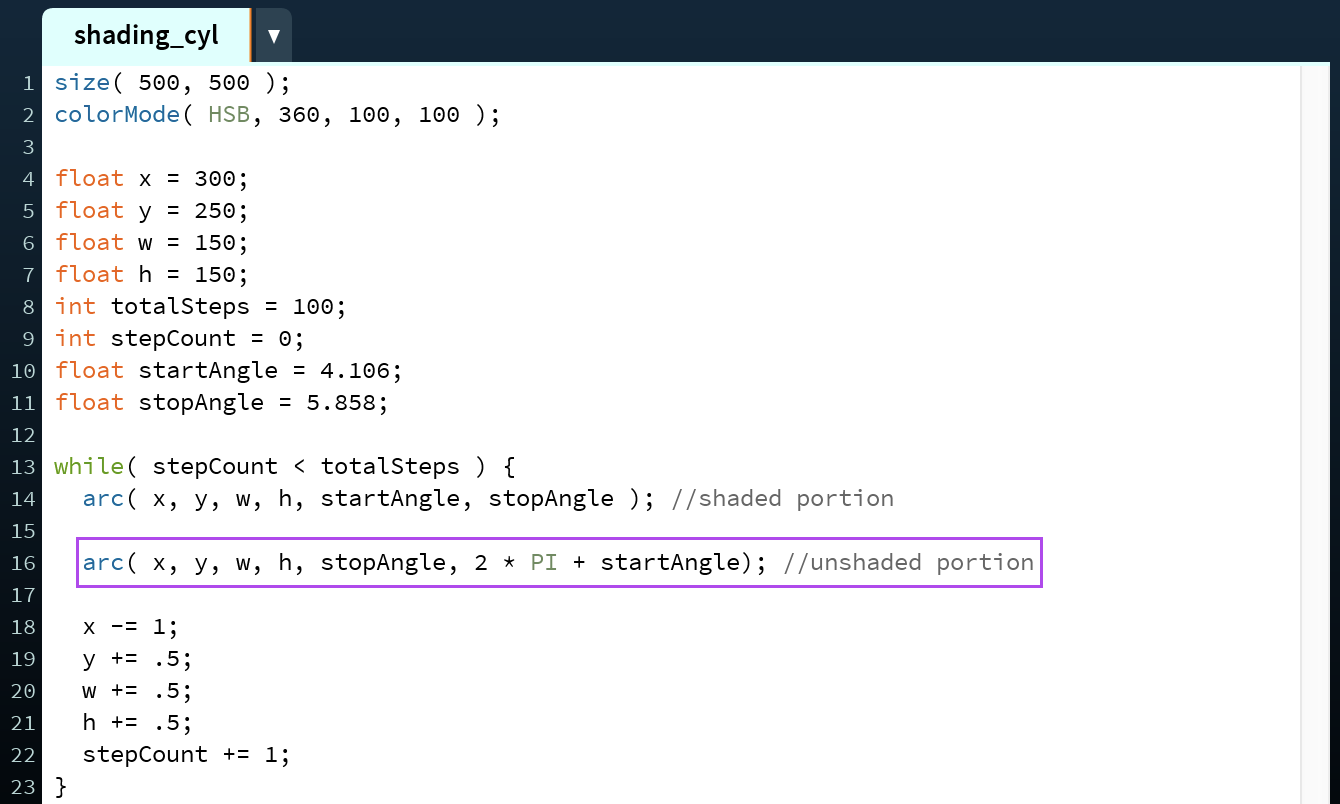
First, replace the ellipse within the loop body with two arcs. The first of these arcs will be the shaded portion (line 14 below). to do this, you will draw an arc that is the same size and in the same place as the ellipse you just removed, meaning that it will have the parameters x, y, w, and h. Its start and stop angles will be startAngle and stopAngle respectively.
Next, draw the second half of the arc pair that will make up this ellipse (line 16 below). It should have the same x, y, w, and h values as the first arc to ensure that they will look like a single ellipse. The start and stop angles of this arc will be different than the first arc's though. What we are aiming to do is have the first arc draw part of an ellipse, from point A to point B, then have the second arc draw the rest of the ellipse, from point B to point A.

To do this, we will have the start angle of the second arc be the stop angle of the first arc. Then, we will have the stop angle of the second ellipse be one full rotation around the ellipse back to the start angle of the first arc. This means that the stop angle of the second arc will be 2 * PI + startAngle because one loop around an ellipse, 360°, is 2π radians.
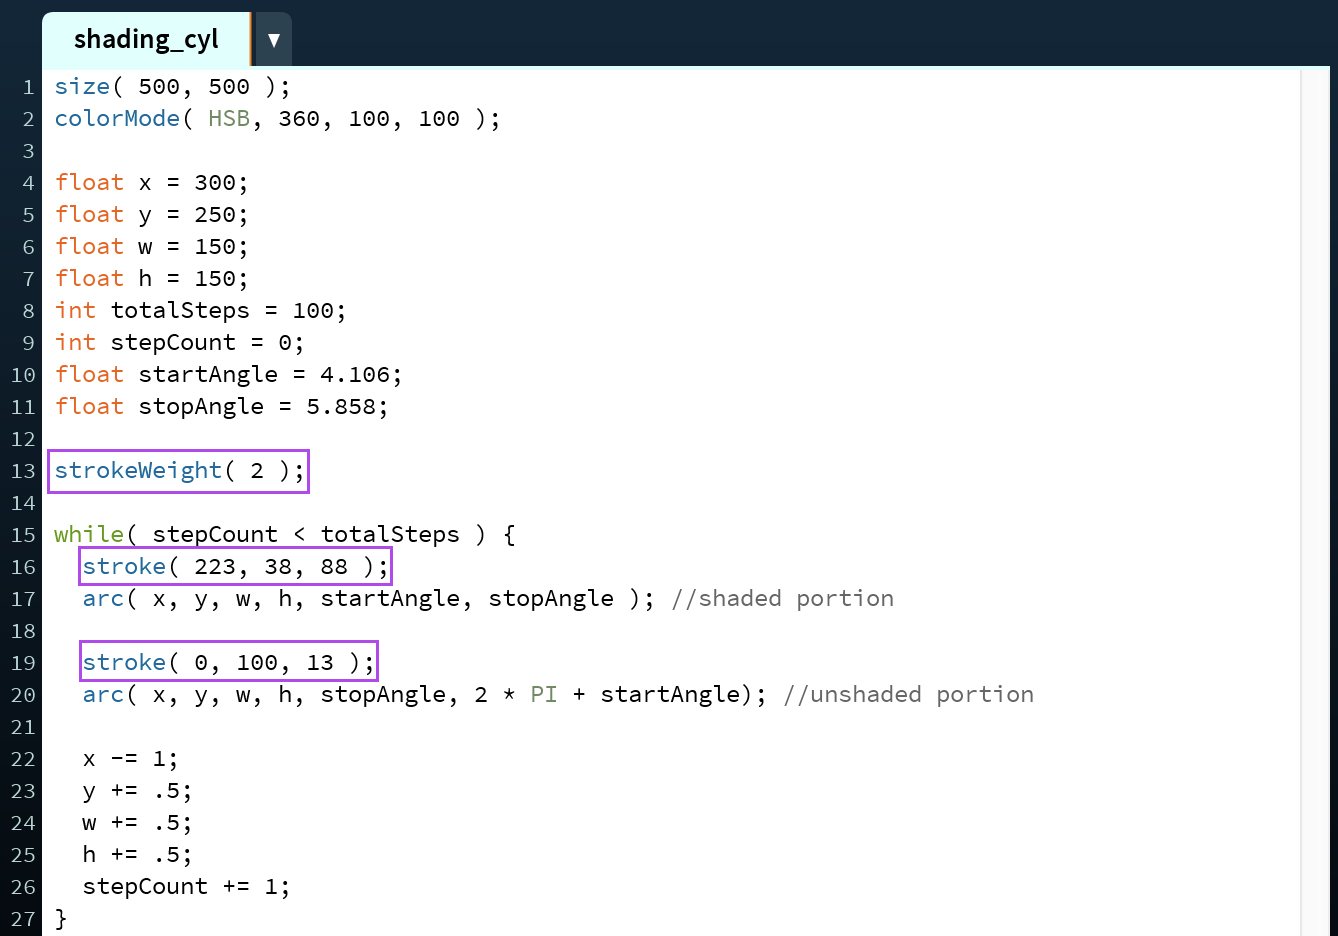
Next, set the stroke colors of the arcs to the colors you want the shaded and unshaded portions of the cylinder's outer wrapping surface to be (lines 16 and 19 below). It can be helpful to set the strokeWeight to 2 because it makes the cylinder look much smoother (line 13 below). This should be done outside of the loop body so that the code doesn't get slowed down by resetting the strokeWeight each time the loop iterates.
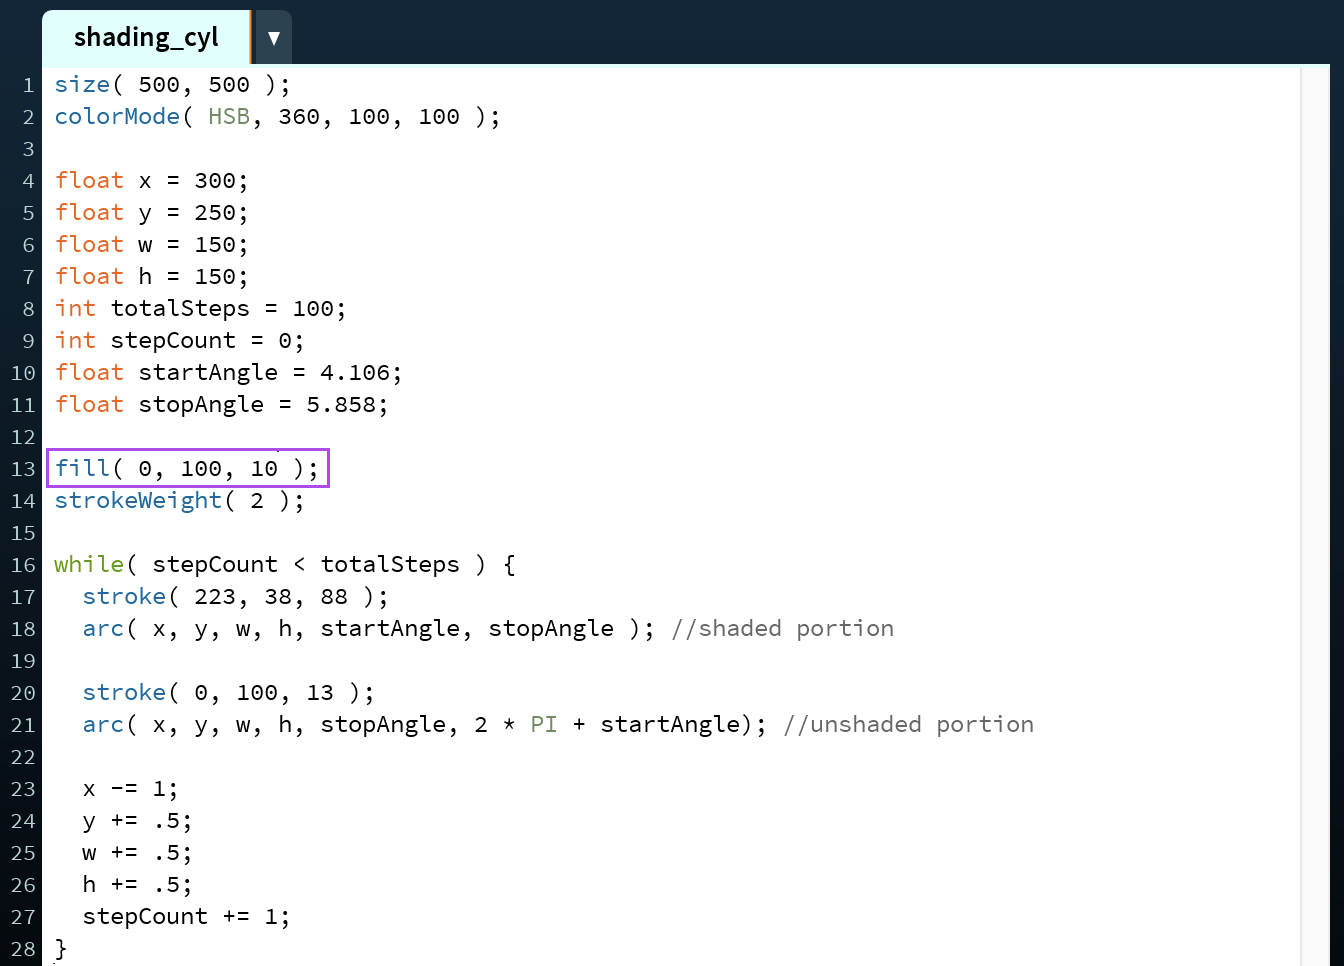
Finally, set the fill color of the arcs to be the color you want the cylinder's elliptical face to be (line 13 below). This should also be done outside of the loop body so the code isn't slowed down by resetting the fill color each time the loop iterates.
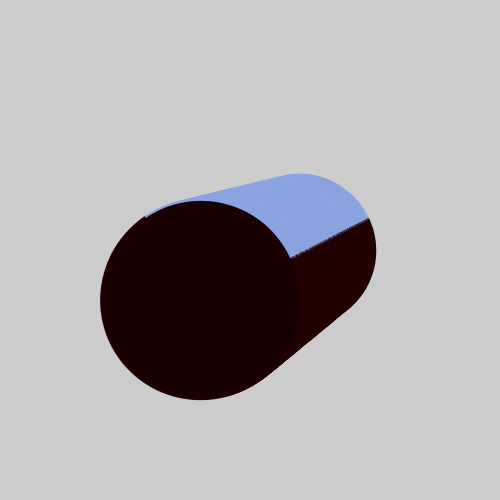
The end result of this loop looks like: