Because it is possible to code cylinders using both for and while loops with exactly the same results, I will go over the process for each. Both have the same idea behind them: using loops to draw stacks of ellipses that change in size and position to make them appear to be solid cylinders.
To code cylinders, you will need to know the x and y coordinates of the centers of the ellipses on each end of the cylinder(x1, y1, x2, and y2), as well as their widths and heights (w1, w2, h1, and h2). It can be difficult to get this information for the farthest ellipse because you can't see all of it, but give it your best estimate.

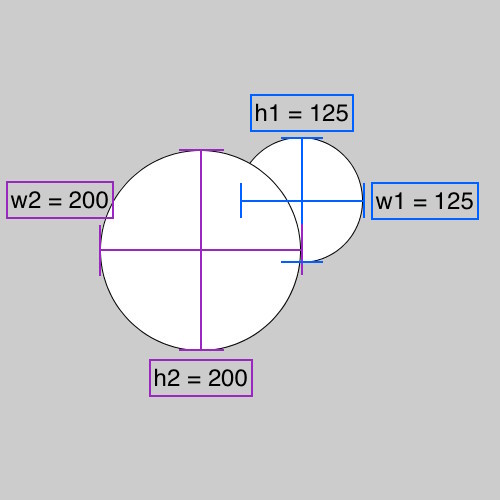
The ellipse that is farthest away from you (with the blue lines) is our starting point, and we'll call it ellipse 1 with the parameters x1, y1, w1, and h1. When looking at a picture of a cylinder, this ellipse will be the one you can only see part of. This is our starting point because when the loop is executed whichever ellipse is drawn first will be hidden beneath the other ellipses. The fact that we can't see the entirety of this ellipse lets us know that it should be hidden beneath other ellipses.
The ellipse closest to you (with the purple lines) is our end point, and we'll call it ellipse 2 with the parameters x2, y2, w2, and h2. When looking at a picture of a cylinder, this ellipse will be the one you can see the entirety of, the ellipse that isn't hidden beneath any other ellipses.
The first thing you need to do it determine the amount that each parameter of the ellipses (x, y, w, and h) will change to get from ellipse 1 to ellipse 2. We'll call these amounts distances, represented by the symbol ∆. All the distances should be positive, so subtract the smaller of the two values from the larger or take the absolute value of your result. In this example, ∆x (the x distance) is 100 (the difference between x1 and x2, or 300-200), ∆y is 50 (the difference between y2 and y1, or 250-200), ∆w is 75 (the difference between w2 and w1, or 200-125), and ∆h is 75 (the difference between h2 and h1, or 200-125).
Next, figure out how many times the loop will iterate, this will be our totalSteps value. It is the larger of ∆x and ∆y. The larger value is used because it ensures that the x and y values will not be updated by a value greater than 1, which will make the cylinder look smoother. Because ∆x in our example is 100, which is greater than the ∆y of 50, our totalSteps value is 100.
Next, divide each distance by the totalSteps value to find the amount that each parameter will need to change for each loop iteration; we'll call this the step. In this example the x step is 1 (100/100), the y step is 0.5 (50/100), the w step is 0.75 (75/100), and the h step is 0.75 (75/100). In some cylinders, one or more parameters of ellipse 1 and ellipse 2 are the same, so their distances and steps are 0, making it uneccessary to update them in the loop.
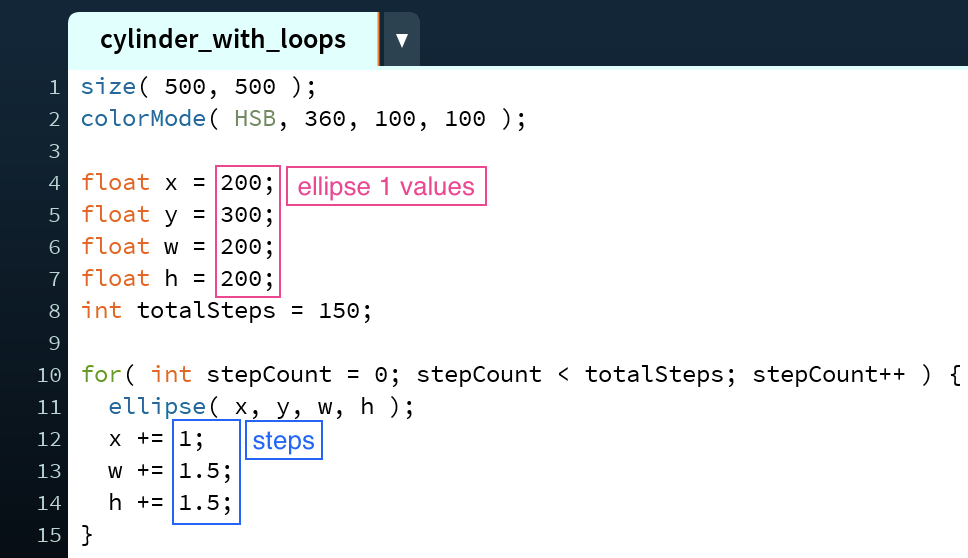
Use the parameters from ellipse 1, the totalSteps, and the step values of each parameter to construct a loop, as demonstrated on lines 4-10 of the for loop example code below.
Regardless of whether you are using a for loop or a while loop, you will need to have variables for x (line 4), y (line 5), width (line 6), height (line 7), and stepCount (intantiated here on line 10), but may also have ones for the step value of each parameter. I include a variable for the totalSteps (line 8) to make it easier to keep track of. It's important to make the x, y, w, and h variables float types and not int types because the step values are frequently floats and it isn't possible to add float values to int variables.
To construct a cylinder using a for loop, have your loop variable keep track of how many iterations have been run (your stepCount), and have the loop end once the stepCount has reached the totalSteps value, increasing stepCount by 1 each time (line 10). Before the loop is run, the x, y, width, and height variables should correspond to those of ellipse 1, our starting point.
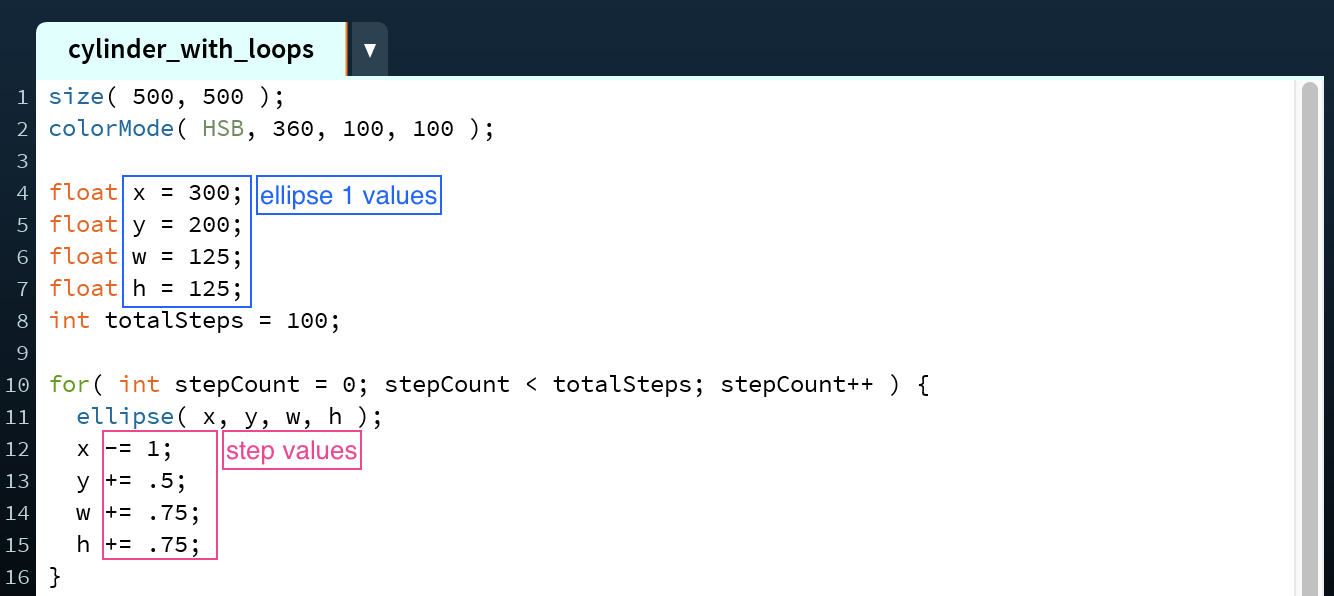
Within the loop, draw an ellipse at position (x,y) with a width w and a height h (line 11). Then, update the variables based on the step values for each parameter (lines 12 - 15). If the value of one of the parameters is smaller in ellipse 2 than in ellipse 1 be sure to subtract the step value for that variable—here this is done on the x variable (line 12). If the value of one of the parameters is larger in ellipse 2 than in ellipse 1 be sure to add the step value for that variable—here this is done on the y, w, and h variables (lines 13 - 15).
To construct a cylinder using a while loop, have the loop iterate until the stepCount (instantiated here on 9) reaches the totalSteps value. As with the for loop, before the loop iterates the x, y, width, and height variables should correspond to those of ellipse 1, our starting point.
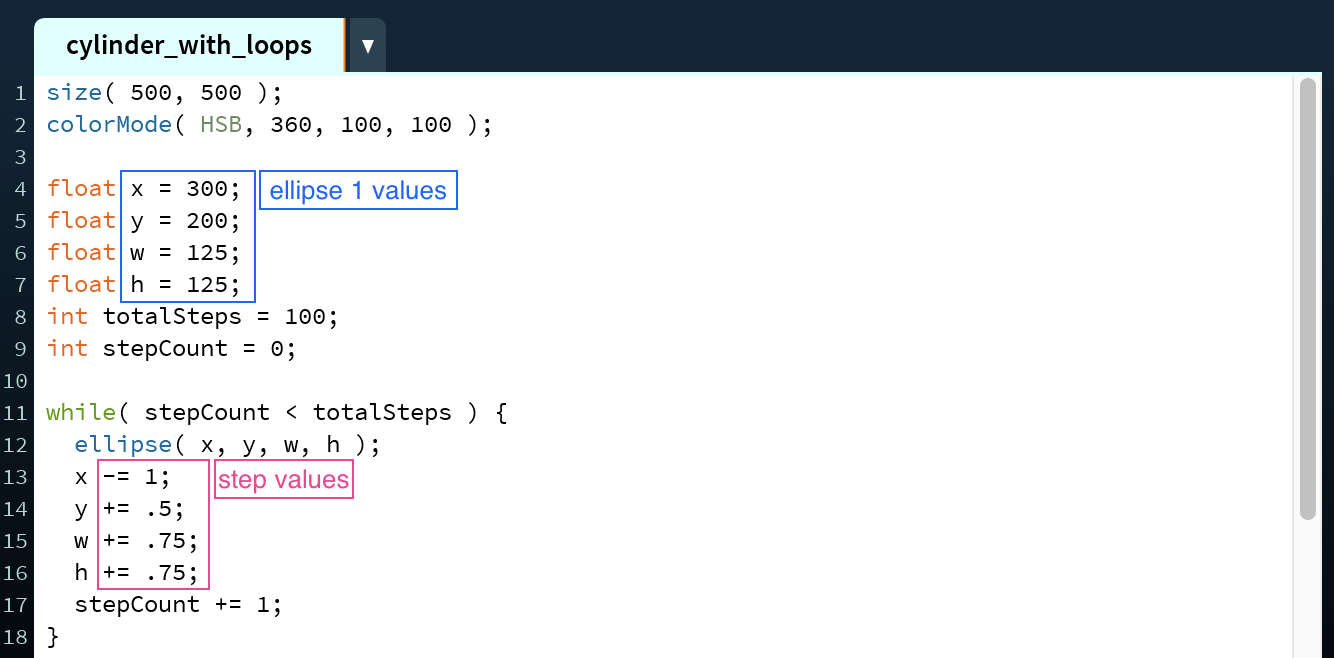
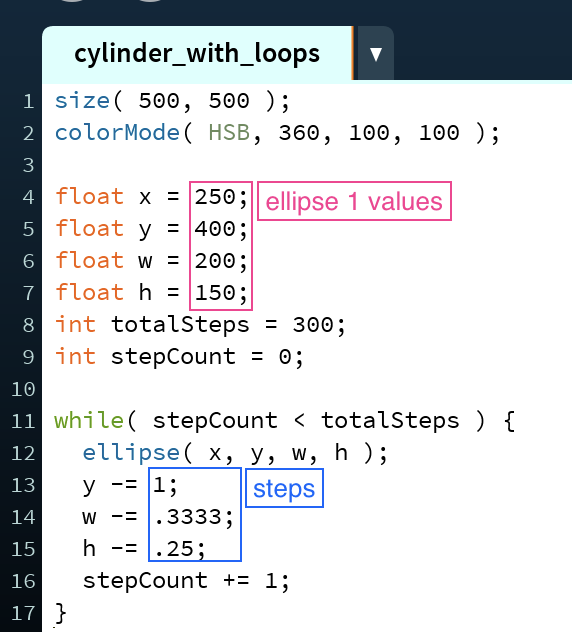
The body of the while loop is similar to that of the for loop. First, draw the ellipse at position (x,y) with width w and height h (line 12). Then, update the variables based on the step values for each parameter (lines 13 - 16). As with above, if the value of one of the parameters is smaller in ellipse 2 than in ellipse 1 be sure to subtract the step value for that variable—here this is done on the x variable (line 13); if the value of one of the parameters is larger in ellipse 2 than in ellipse 1 be sure to add the step value for that variable—here this is done on the y, w, and h variables (lines 14 - 16). Because this is a while loop, it is also necessary to update the stepCount variable by 1 within the loop body to ensure the loop isn't infinite (line 17).

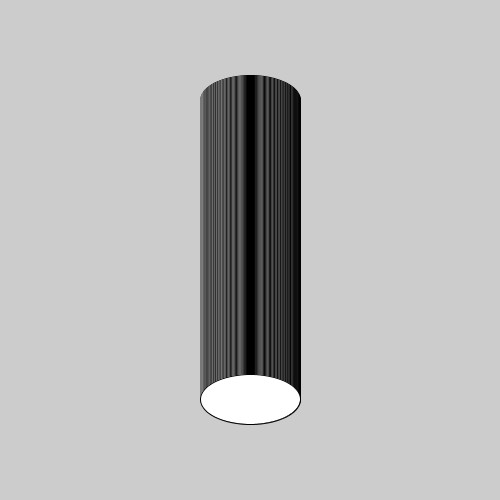
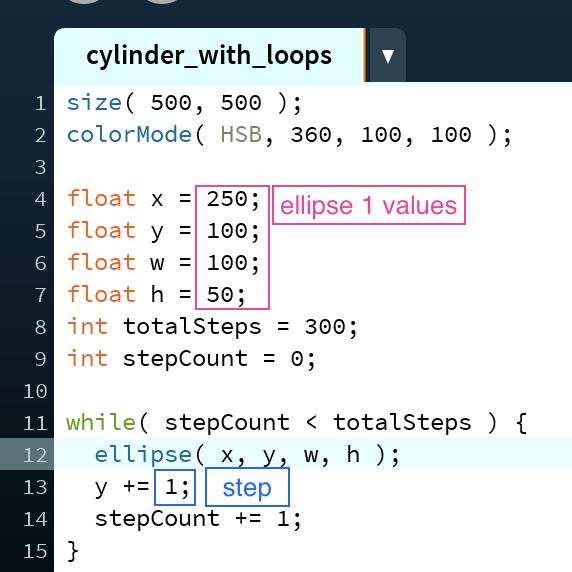
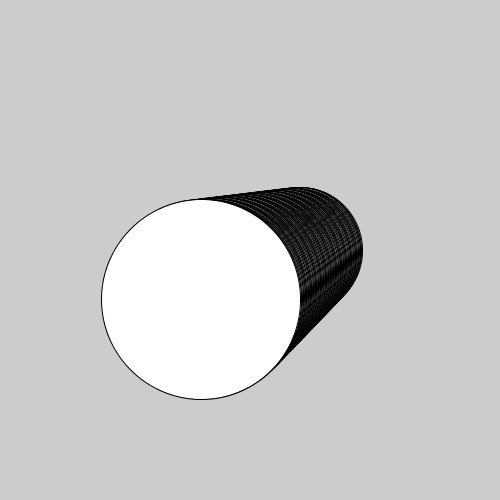
This formula can be used for many different kinds of cylinders, as shown below.
In this first example, because ellipse 1 is the ellipse at the top of the screen, the result is a cylinder viewed from below. If ellipse 1 had been the ellipse closest to the bottom of the screen then the resulting image would have been a cylinder viewed from above. This is also an example of a cylinder in which only one parameter is updated.
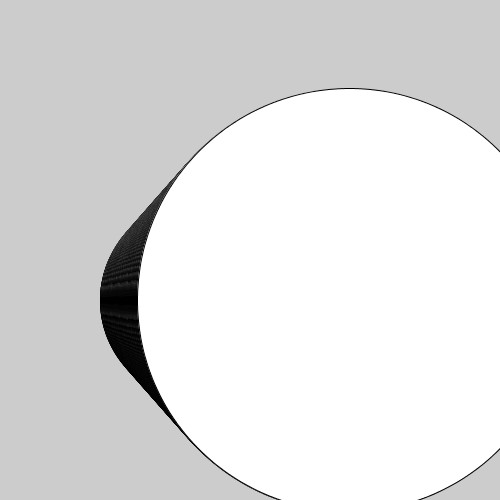
In the second example, as with the first, the result is a cylinder viewed form below. If the ellipse closest to the top of the screen had been ellipse 2 instead of ellipse 1, the result would have been a cylinder viewed from above. This is also an example of a cylinder in which all four parameters are updated.


In the third example, the result is a cylinder viewed head on. Due to the fact that objects in perspective appear to be larger the closer they are to the viewer, the cylinder appears to be pointed at the viewer because ellipse 1 is smaller than ellipse 2. In this instance, if ellipse 1 was the largest ellipse and ellipse 2 was the smallest, the cylinder would no longer look like it was in perspective, but instead look very unusual as the smallest ellipse would be seen and the other, larger ellipses would fan out around it. This is also an example of a cylinder in which three parameters are updated.
In this fourth, and final, example, the result is a cylinder viewed from above. If the ellipse closest to the top of the screen had been ellipse 1 instead of ellipse 2, the result would have been a cylinder viewed from below. This is also an example of a cylinder in which three parameters are updated.