Writing a Switchyard program
A Switchyard program is simply a Python program that includes a particular entrypoint function which accepts a single parameter. The startup function can simply be named main, but can also be named switchy_main if you like. The function must accept at least one parameter, which is a reference to the Switchyard network object (described below). Method calls on the network object are used to send and receive packets to and from network ports.
A Switchyard program isn’t executed directly with the Python interpreter. Instead, the program swyard is used to start up the Switchyard framework and to load your code. When Switchyard starts your code it looks for a function named main and invokes it, passing in the network object as the first parameter. Details on how to start Switchyard (and thus your program) are given in the chapters on running a Switchyard in the test environment and running Switchyard in a live environment. Note that it is possible to pass arguments into a Switchyard program; see Passing arguments into a Switchyard program for details.
A Switchyard program will typically also import other Switchyard modules such as modules for parsing and constructing packets, dealing with network addresses, and other functions. These modules are introduced below and described in detail in the API reference chapter.
Introducing the “network object”
As mentioned above, a Switchyard program can simply have a main function that accepts a single argument. The parameter passed to main is called the “network object”. It is on this object that you can call methods for sending and receiving packets and getting information about ports on the device for which you’re implementing the logic.
Sending and receiving packets
As a way to describe two of the most important methods on the network object, here is a program that receives one packet, prints it out, sends it back out the same interface, then quits.
Notice in the code below that we only need to import switchyard.lib.userlib to get access to various Switchyard classes and functions; generally speaking, this is the only import you should ever need for any Switchyard program. Although you can import individual Switchyard modules separately (for the specific module to import, see API Reference), but you will probably find that importing userlib is much easier.
from switchyard.lib.userlib import *

def main(net):
    timestamp,input_port,packet = net.recv_packet()
    print ("Received {} on {}".format(packet, input_port))
    net.send_packet(input_port, packet)
This program isn’t likely to be very useful — it is just meant as an illustration of the most important two methods on the network object:
recv_packet(timeout=None)Not surprisingly, this method is used to receive at most one packet from any port. The method will block until a packet is received, unless a timeout value >=0 is given. The default is to block indefinitely. The method returns a namedtuple of length 3, which includes a timestamp for when the packet was received, the name of the input port on which the packet was received, and the packet itself (another example is given below, plus see
collections.namedtuplein the Python library reference).The method raises a
Shutdownexception if the Switchyard framework has been shut down. It can also raise aNoPacketsexception if no packets are received before the timeout value given to the method expires.
send_packet(output_port, packet)Again, the meaning of this method call is probably not especially surprising: when called, the given packet will be sent out the given output port. For the
output_portparameter, the string name of the port can be given, or anInterfaceobject may also be supplied (see below for more about Interface objects as well as the Interface and InterfaceType reference).This method returns
None. If theoutput_portor some detail about the given packet is invalid (e.g., something other than a packet is passed as the second parameter), this method raises aValueError.
Returning briefly to the recv_packet method, observe that in the above example no arguments are given so the call will block until a packet is received. Also, it is important to recognize that the return type of recv_packet is a namedtuple of exactly three elements so in addition to automatically unpacking the tuple as in the above example, you can use indexing or attribute-like syntax on the return value from recv_packet. For example (using attribute-syntax):
from switchyard.lib.userlib import *

def main(net):
    # below, recvdata is a namedtuple
    recvdata = net.recv_packet()
    print ("At {}, received {} on {}".format(
        recvdata.timestamp, recvdata.packet, recvdata.input_port))

    # alternatively, the above line could use indexing, although
    # readability suffers:
    #    recvdata[0], recvdata[2], recvdata[1]))

    net.send_packet(recvdata.input_port, recvdata.packet)

    # likewise, the above line could be written using indexing
    # but, again, readability suffers:
    # net.send_packet(recvdata[1], recvdata[2])
Importantly, note that in the above examples we are not handling any potential exceptions that could occur. In particular, we really should be handling at least the situation in which the framework is shut down (and we receive a Shutdown exception). Just for completeness, we should also handle the NoPackets exception, although if the code is designed to block indefinitely we shouldn’t normally receive that particular exception.
Let’s rewrite the code above, and now put everything in a while loop so that we keep reading and sending packets as long as we’re running. We will eventually turn this code into a working network hub implementation [1], but it’s currently broken because it still just sends a packet out the same port on which it arrived:
from switchyard.lib.userlib import *

def main(net):
    while True:
        try:
            timestamp,input_port,packet = net.recv_packet()
        except Shutdown:
            log_info ("Got shutdown signal; exiting")
            break
        except NoPackets:
            log_info ("No packets were available.")
            continue

        # if we get here, we must have received a packet
        log_info ("Received {} on {}".format(packet, input_port))
        net.send_packet(input_port, packet)
In the example above, notice that we also changed the print function calls to log_info. Switchyard uses built-in Python logging capabilities (see logging in the Python library reference) for printing various notices to the console. The logging functions, described below, each just accept one string parameter which is just the text to be printed on the console.
For full details of the send_packet and recv_packet method calls, refer to Net object reference in the API Reference section at the end of this documentation.
Getting information about ports (interfaces) on the device
Other methods available the network object relate to getting information about the ports/interfaces attached to the device on which the Switchyard code is running. The two basic methods are interfaces and ports. These methods are aliases and do exactly the same thing. In particular:
interfaces()This method returns a list of interfaces that are configured on the network device, as a list of
Interfaceobjects. The alias methodports()does exactly the same thing. There is no inherent ordering to the list ofInterfaceobjects returned.
Each Interface object has a set of properties that can be used to access various configured attributes for the interface:
name: returns the name of the interface (e.g.,en0) as a string.ethaddr: returns the Ethernet address associated with the interface, as aswitchyard.lib.address.EthAddrinstance.ipaddr: returns the IPv4 address associated with the interface, if any. This property returns an object of typeIPv4Address. If there is no address assigned to the interface, the address is 0.0.0.0. A current limitation with theInterfaceimplementation in Switchyard is that only one address can be associated with an interface, and it must be an IPv4 address. Eventually, Switchyard will fully support IPv6 addresses, and multiple IP addresses per interface.netmask: returns the network mask associated with the IPv4 address assigned to the interface. The netmask defaults to 255.255.255.255 (/32) if none is specified.ifnum: returns an integer index associated with the interface.iftype: returns the type of the interface, if it can be inferred by Switchyard. The return type is a value from theswitchyard.lib.interface.InterfaceTypeenumerated type. The type can either beUnknown,Loopback,Wired, orWireless. The type is automatically set when an interface is initialized. Note that in some cases the type can be inferred, but in others it cannot (thus the potential for anUnknownvalue).
All the above properties except ifnum and iftype are modifiable. Changing them can be accomplished just by assigning a new value to the property. Beware, though, that changing address values has no effect on the underlying host operating system if Switchyard is run in a live environment, so you would generally be wise to leave the addresses alone.
For full interface details, see Interface and InterfaceType reference.
As an example, to simply print out information regarding each interface defined on the current network device you could use the following program:
def main(net):
    for intf in net.interfaces():
        log_info("{} has ethaddr {} and ipaddr {}/{} and is of type {}".format(
            intf.name, intf.ethaddr, intf.ipaddr, intf.netmask, intf.iftype.name))

    # could also be:
    # for intf in net.ports():
    #    ...
Entirely depending on how the network device is configured, output from the above program might look like the following:
09:10:08 2016/12/17     INFO eth0 has ethaddr 10:00:00:00:00:01 and ipaddr 172.16.42.1/255.255.255.252 and is of type Unknown
09:10:08 2016/12/17     INFO eth1 has ethaddr 10:00:00:00:00:02 and ipaddr 10.10.0.1/255.255.0.0 and is of type Unknown
09:10:08 2016/12/17     INFO eth2 has ethaddr 10:00:00:00:00:03 and ipaddr 192.168.1.1/255.255.255.0 and is of type Unknown
The above example code was run in the Switchyard *test* environment; when a Switchyard program is run in test mode, all interfaces will show type Unknown. Note also that there is no inherent ordering to the list of interfaces returned.
There are a few convenience methods related to ports and interfaces,
which can be used to look up a particular interface given a name, IPv4 address,
or Ethernet (MAC) address:
interface_by_name(name): This method returns anInterfaceobject given a string name of a interface. An alias methodport_by_name(name)also exists.interface_by_ipaddr(ipaddr): This method returns anInterfaceobject given an IP address configured on one of the interfaces. The IP address may be given as a string or as an IPv4Address object. An alias methodport_by_ipaddr(ipaddr)also exists.interface_by_macaddr(ethaddr): This method returns anInterfaceobject given an Ethernet (MAC) address configured on one of the interfaces. An alias methodport_by_macaddr(ethaddr)also exists.
Note that the above lookup methods raise a KeyError exception if the lookup name is invalid.
Other methods on the network object
Lastly, there is a shutdown method available on the network object. This method should be used by a Switchyard program prior to exiting in order to clean up and shut down various resources.
Let’s now add a bit to the previous example program to turn it into an almost-complete implementation of a hub. Whenever we receive a packet, we need to loop through the ports on the device and send the packet on a port as long as the port isn’t the one on which we received the packet (lines 21-23, below):
1 2 3 4 5 6 7 8 9 10 11 12 13 14 15 16 17 18 19 20 21 22 23 24 25 26 | from switchyard.lib.userlib import *
def main(net):
# add some informational text about ports on this device
log_info ("Hub is starting up with these ports:")
for port in net.ports():
log_info ("{}: ethernet address {}".format(port.name, port.ethaddr))
while True:
try:
timestamp,input_port,packet = net.recv_packet()
except Shutdown:
# got shutdown signal
break
except NoPackets:
# try again...
continue
# send the packet out all ports *except*
# the one on which it arrived
for port in net.ports():
if port.name != input_port:
net.send_packet(port.name, packet)
# shutdown is the last thing we should do
net.shutdown()
|
There’s still one thing missing from the above code, which is for the hub to ignore any frames that are destined to the hub itself. That is, if an Ethernet destination address in a received frame is the same as an Ethernet address assigned to one of the ports on the hub, the frame should not be forwarded (it can simply be ignored). Finishing off the hub by doing this is left as an exercise.
Introduction to packet parsing and construction
This section provides an overview of packet construction and parsing in Switchyard. For full details on these capabilities, see Packet parsing and construction reference.
Switchyard’s packet construction/parsing library is found in switchyard.lib.packet. Its design is based on a few other libraries out there, including POX’s library [2] and Ryu’s library [3].
There are a few key ideas to understand when using the packet library:
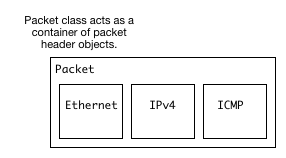
- The
Packetclass acts as a container of headers (or rather, of header objects).- Headers within a packet can be accessed through methods on the Packet container object, and also by indexing. Headers are ordered starting with lowest layer protocols. For example, if a
Packethas anEthernetheader (which is likely to be the lowest layer protocol), this header can be accessed with index 0 as inpktobj[0]. Indexes can be integers, and they can also be packet header class names (e.g.,Ethernet,IPv4, etc.). For example, to access theEthernetheader of a packet, you can writepktobj[Ethernet].- Fields in header objects are accessed through standard Python properties. The code to manipulate header fields thus looks like it is just accessing instance variables, but “getter” and “setter” method calls actually take place, depending on whether a property is being retrieved or assigned to.
- A packet object can be constructed by either expliciting instantiating an object and adding headers, or it can be formed by “adding” (using the
+operator) headers together, or by appending headers onto a packet (using+or+=).- The Switchyard framework generally automatically handles serializing and deserializing Packet objects to and from byte sequences (i.e., wire format packets), but you can also explicitly invoke those methods if you need to.
Here are some examples using Ethernet, IPv4, and ICMP headers. First, let’s construct a packet object and add these headers to the packet:
>>> from switchyard.lib.packet import *
>>> p = Packet()   # construct a packet object
>>> e = Ethernet() # construct Ethernet header
>>> ip = IPv4()    # construct IPv4 header
>>> icmp = ICMP()  # construct ICMP header
>>> p += e         # add eth header to packet
>>> p += ip        # add ip header to packet
>>> p += icmp      # add icmp header to packet
>>> print (p)
Ethernet 00:00:00:00:00:00->00:00:00:00:00:00 IP | IPv4 0.0.0.0->0.0.0.0 ICMP | ICMP EchoRequest 0 0 (0 data bytes)
A shorthand for doing the above is:
>>> p = Ethernet() + IPv4() + ICMP()
The effect of the + operator with header objects as in the previous line is to construct a packet object, just as the first example. Note that with the above one-line example, the default Ethertype for the Ethernet header is IPv4, and the default protocol number for IPv4 is ICMP. Thus, this example is somewhat special in that we didn’t need to modify any of the packet header fields to create a (mostly) valid packet. Lastly, note that the order in which we add packet headers together to construct a full packet is important: lower layers (e.g., Ethernet) must come first, followed by other protocol headers in their correct order.
Switchyard does not ensure that a constructed Packet is sensible in any way. It is possible to put headers in the wrong order, to supply illogical values for header elements (e.g., a protocol number in the IPv4 header that doesn’t match the next header in the packet), and to do other invalid things. Switchyard gives you the tools for constructing packets, but doesn’t tell you how to do so.
The num_headers Packet method returns the number of headers in a packet, which returns the expected number for this example:
>>> p.num_headers()
3
Note that the len function on a packet returns the number of bytes that the Packet would consume if it was in wire (serialized) format. The size method returns the same value.
>>> len(p)
42
>>> p.size()
42
(Note: Ethernet header is 14 bytes + 20 bytes IP + 8 bytes ICMP = 42 bytes.)
Packet header objects can be accessed conveniently by indexing. Standard negative indexing also works. For example, to obtain a reference to the Ethernet header object and to inspect and modify the Ethernet header, we might do the following:
>>> p[0] # access by index
<switchyard.lib.packet.ethernet.Ethernet object at 0x104474248>
>>> p[0].src
EthAddr('00:00:00:00:00:00')
>>> p[0].dst
EthAddr('00:00:00:00:00:00')
>>> p[0].dst = "ab:cd:ef:00:11:22"
>>> str(p[0])
'Ethernet 00:00:00:00:00:00->ab:cd:ef:00:11:22 IP'
>>> p[0].dst = EthAddr("00:11:22:33:44:55")
>>> str(p[0])
'Ethernet 00:00:00:00:00:00->00:11:22:33:44:55 IP'
>>> p[0].ethertype
<EtherType.IP: 2048>
>>> p[0].ethertype = EtherType.ARP
>>> print (p)
Ethernet 00:00:00:00:00:00->00:00:00:00:00:00 ARP | IPv4 0.0.0.0->0.0.0.0 ICMP | ICMP EchoRequest 0 0 (0 data bytes)
>> p[0].ethertype = EtherType.IPv4 # set it back to sensible value
Note that all header field elements are accessed through properties. For Ethernet headers, there are three properties that can be inspected and modified, src, dst and ethertype, as shown above. Notice also that Switchyard doesn’t prevent a user from setting header fields to illogical values, e.g., when we set the ethertype to ARP although the next header is IPv4, not ARP. All EtherType values are specified in switchyard.lib.packet.common, and imported when the module switchyard.lib.packet is imported.
Accessing header fields in other headers works similarly. Here are examples involving the IPv4 header:
>>> p.has_header(IPv4)
True
>>> p.get_header_index(IPv4)
1
>>> str(p[1]) # access by index
'IPv4 0.0.0.0->0.0.0.0 ICMP'
>>> str(p[IPv4]) # access by header type
'IPv4 0.0.0.0->0.0.0.0 ICMP'
>>> p[IPv4].protocol
<IPProtocol.ICMP: 1>
>>> p[IPv4].src
IPv4Address('0.0.0.0')
>>> p[IPv4].dst
IPv4Address('0.0.0.0')
>>> p[IPv4].dst = '149.43.80.13'
IPv4 protocol values are specified in switchyard.lib.packet.common, just as with EtherType values. Note, however, that you do not need to explicitly import this module if you import switchyard.lib.userlib — packet-related classes and enumerations are imported when importing userlib. The full set of properties that can be manipulated in the IPv4 header as well as all other headers is described in the reference documentation for the packet library.
Lastly, an example with the ICMP header shows some perhaps now familiar patterns. The main difference with ICMP is that the “data” portion of an ICMP packet changes, depending on the ICMP type. For example, if the type is 8 (ICMP echo request) the ICMP data becomes an object that allows the identifier and sequence values to be inspected and modified.
>>> p.has_header(ICMP)
True
>>> p.get_header_index(ICMP)
2
>>> p[2] # access by index; notice no conversion to string
<switchyard.lib.packet.icmp.ICMP object at 0x104449c78>
>>> p[ICMP] # access by header type
<switchyard.lib.packet.icmp.ICMP object at 0x104449c78>
>>> p[ICMP].icmptype
<ICMPType.EchoRequest: 8>
>>> p[ICMP].icmpcode
<EchoRequest.EchoRequest: 0>
>>> p[ICMP].icmpdata
<switchyard.lib.packet.icmp.ICMPEchoRequest object at 0x1044742c8>
>>> icmp.icmpdata.sequence
0
>>> icmp.icmpdata.identifier
0
>>> icmp.icmpdata.identifier = 42
>>> icmp.icmpdata.sequence = 13
>>> print (p)
Ethernet 00:00:00:00:00:00->00:11:22:33:44:55 IP | IPv4 0.0.0.0->149.43.80.13 ICMP | ICMP EchoRequest 42 13 (0 data bytes)
By default, no “payload” data are included in with an ICMP header, but we can change that using the data property on the icmpdata part of the header:
>>> icmp.icmpdata.data = "hello, world"
>>> print (p)
Ethernet 00:00:00:00:00:00->00:11:22:33:44:55 IP | IPv4 0.0.0.0->149.43.80.13 ICMP | ICMP EchoRequest 42 13 (12 data bytes)
Python keyword argument syntax can be used to assign values to header fields when a header object is constructed. This kind of syntax can make packet construction a bit more compact and streamlined. For example, if we wanted to make a UDP packet with some payload, we could do something like the following:
>>> e = Ethernet(src="11:22:33:44:55:66", dst="66:55:44:33:22:11", ethertype=EtherType.IP)
>>> ip = IPv4(src="1.2.3.4", dst="4.3.2.1", protocol=IPProtocol.UDP, ttl=32)
>>> udp = UDP(src=1234, dst=4321)
>>> p = e + ip + udp + b"this is some application payload!"
>>> print(p)
Ethernet 11:22:33:44:55:66->66:55:44:33:22:11 IP | IPv4 1.2.3.4->4.3.2.1 UDP | UDP 1234->4321 | RawPacketContents (33 bytes) b'this is so'...
>>>
Finally, to serialize the packet into a wire format sequence of bytes, we can use the to_bytes() method:
>>> p.to_bytes()
b'\x00\x11"3DU\x00\x00\x00\x00\x00\x00\x08\x00E\x00\x00(\x00\x00\x00\x00\x00\x01\xba\xd6\x00\x00\x00\x00\x00\x00\x00\x00\x08\x00\xb7|\x00*\x00\rhello, world'
Switchyard normally handles deserialization automatically, but there is a from_bytes(raw) method available that accepts a raw bytes object and reconstructs packet header attributes. It either succeeds or throws an exception. It returns any bytes that were not necessary for reconstructing the header.
As mentioned above, Switchyard does not require packets to be correctly constructed (e.g., there may be a TCP header in a packet without any IP header). As a result, while serialization will often succeed even if the packet is malformed, whereas deserialization often will not. The reason is that in deserialization, the contents of bytes earlier in a packet are necessary for determining how to reconstruct later headers and attributes in a packet (e.g., the ethertype attribute in the Ethernet header is necessary for determining which header comes next).
Other header classes that are available in Switchyard include Arp, UDP, TCP, IPv6, and ICMPv6. Again, see the packet library reference documentation for details on these header classes, and full documentation for all classes.
Utility functions
There are a few additional utility functions that are useful when developing a Switchyard program related to logging and debugging.
Logging functions
Switchyard uses Python’s standard logging facilities and provides four convenience functions. Each of these functions takes a string as a parameter and prints it to the console as a logging message. The only difference with the functions relates to the logging level (see logging in the Python library reference), and whether the output is colored to visually highlight a problem. The default logging level is INFO within Switchyard. If you wish to include debugging messages, you can use the -d flag for the various invocation programs (e.g., swyard), as described in Running in the test environment and Running in a “live” environment.
-
log_debug(str)¶ Write a debugging message to the log using the log level DEBUG.
-
log_info(str)¶ Write a debugging message to the log using the log level INFO.
-
log_warn(str)¶ Write a debugging message to the log using the log level WARNING. Output is colored magenta.
-
log_failure(str)¶ Write a debugging message to the log using the log level CRITICAL. Output is colored red.
While you can still use the built-in print function to write messages to the console, using the log functions provides a much more structured way of writing information to the screen.
Invoking the debugger
Although a longer discussion of debugging is included in a later section, it is worth mentioning that there is a built-in function named debugger that can be used anywhere in Switchyard code to immediately invoke the standard Python pdb debugger.
For example, if we add a call to debugger() in the example code above just after the try/except block, then run the code in a test environment, the program pauses immediately after the call to debugger and the pdb prompt is shown:
# after hub code is started in test environment,
# some output is shown, followed by this:

> /Users/jsommers/Dropbox/src/switchyard/xhub.py(29)main()
-> for port in net.ports():
(Pdb) list
 24
 25                 debugger()
 26
 27                 # send the packet out all ports *except*
 28                 # the one on which it arrived
 29  ->             for port in net.ports():
 30                     if port.name != input_port:
 31                         net.send_packet(port.name, packet)
 32
As you can see, the program is paused on the next executable line following the call to debugger(). At this point, any valid pdb commands can be given to inspect or alter program state. Once again, see later sections for details on running Switchyard code in a live environment and on other debugging capabilities.
Passing arguments into a Switchyard program
It is possible to pass in additional arguments to a Switchyard program via its main function. To accept additional arguments into your main function, you should at least add a *args parameter. You can optionally also accept keyword-style arguments by including a **kwargs parameter. For example, here is the initial part of a main function which accepts both:
def main(netobj, *args, **kwargs):
    # args is a list of arguments
    # kwargs is a dictionary of key-value keyword arguments
As noted in the code comment, the parameter *args will collect any non-keyword arguments into a list and the parameter **kwargs will collect any keyword-style arguments into a dictionary. Note that all argument values are passed in as strings, so your program may need to do some type conversion.
To pass arguments into your main function from invoking swyard on the command line, use the -g option. This option accepts a string, which should include all arguments to be passed to your main function, each separated by spaces. For keyword-style arguments, you can use the syntax param=value. Any space-separated strings that do not include the = character as passed into the arglist (args). For example, to pass in the value 13 and the keyword parameter debug=True, you could use the following command-line:
$ swyard -g "13 debug=True" ... (other arguments to swyard)
When invoking your main function, args would have a single value (the string '13') and kwargs would be the dictionary {'debug': 'True'} (notice that True would be a string since all arguments end up being passed in as strings).
Footnotes
| [1] | A hub is a network device with multiple physical ports. Any packet to arrive on a port is sent back out all ports except for the one on which it arrived. |
| [2] | https://github.com/noxrepo/pox |
| [3] | https://github.com/osrg/ryu |